highlights
No highlights have been published so far.
plz donate
Do you have some cryptocurrencies to spare?
We'd love if you donate them!
Donate now!
Service kindly provided by Blockchain Financial.
bits du jour
news
 Facebook login no longer available
Due to recent changes in Facebook policies, icomancer cannot continue using the Facebook Login method due to incompatibilities. view
Two new folder templates released!A user asked us on the forum for a non-transparent version of the Vista and Windows Crystal Blue templates. We put our hands on them and now are available for download. view
New color packs released!After a long time without publishing downloadable contents for our Premium users, we released seven color packs. view
See icomancer in action!
Getting Started
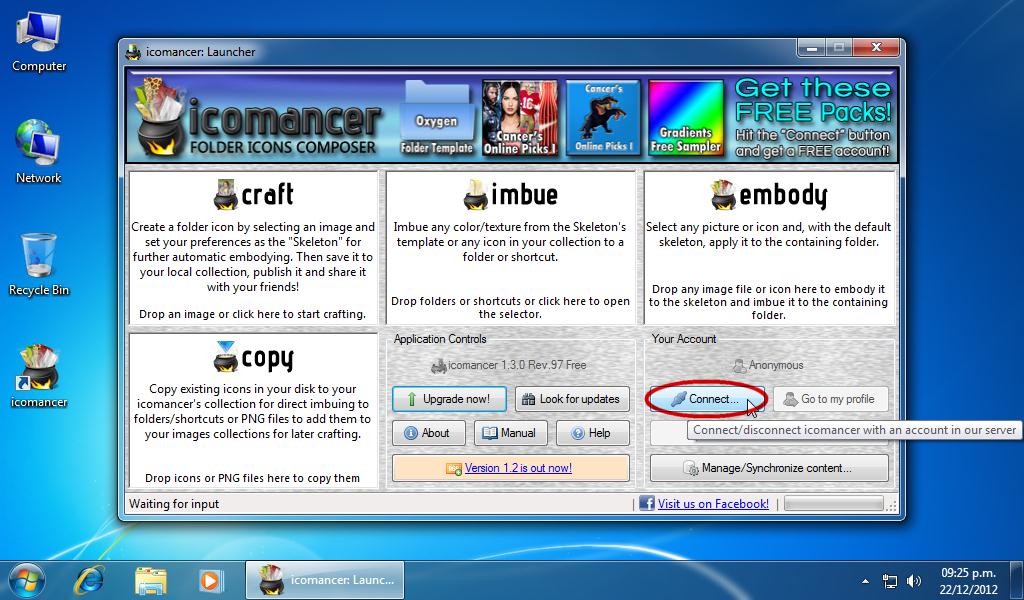
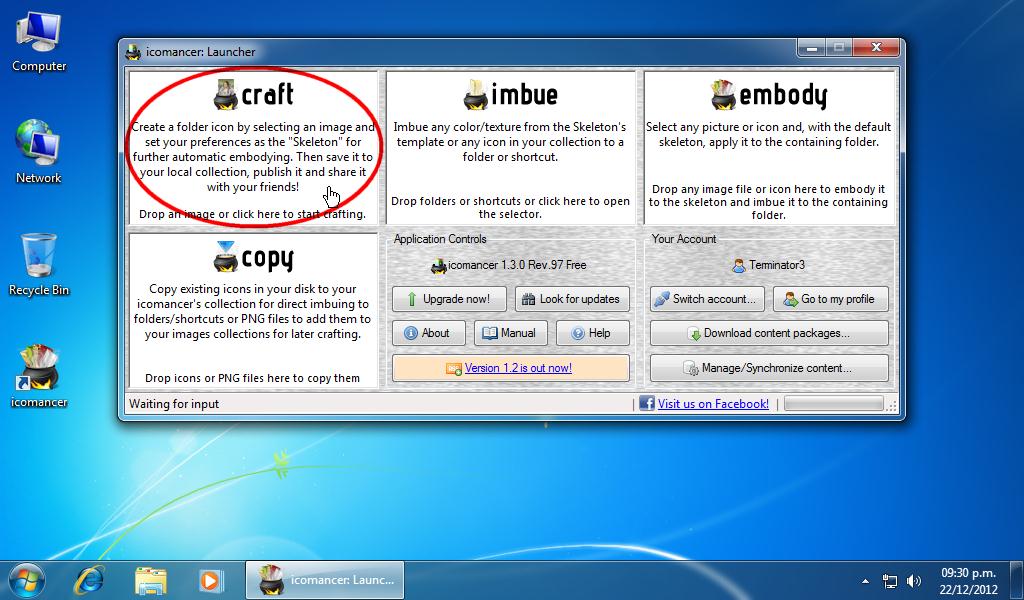
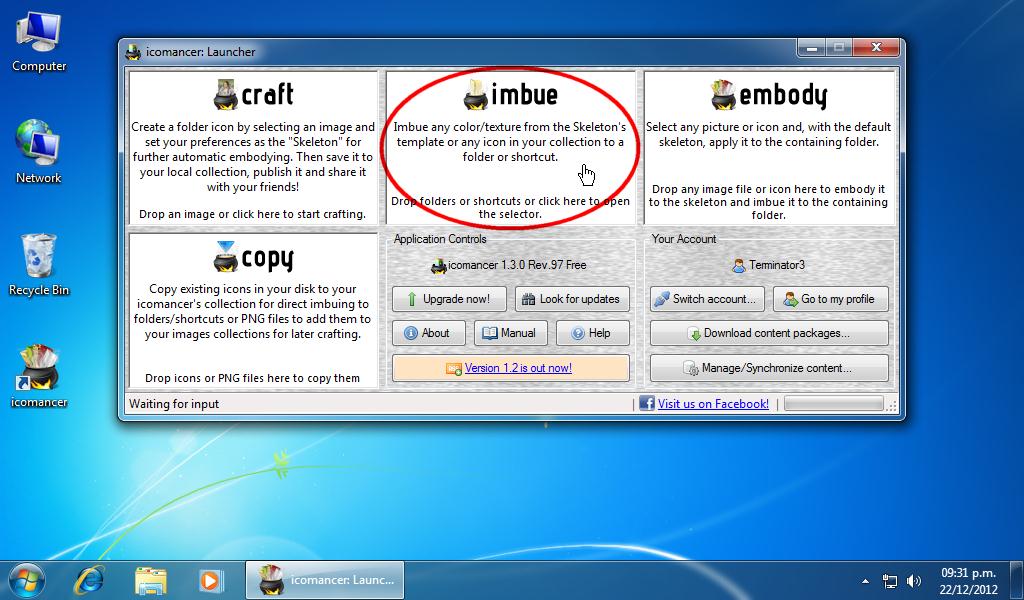
icomancer operates through the "Launcher". Here you find four main function areas that can be clicked to open the corresponding window. As you can read in the descriptions, all of them are drop targets, so you can drag items from the Windows Explorer and drop them in the chosen area of effect, depending on the type of the item you're dragging.
| The Launcher window, where everything starts | Creating a free account |
|
|
|
The Launcher is the main icomancer's interface. In order to get access to the free
downloads, you have to click on the "Connect..." button.
|
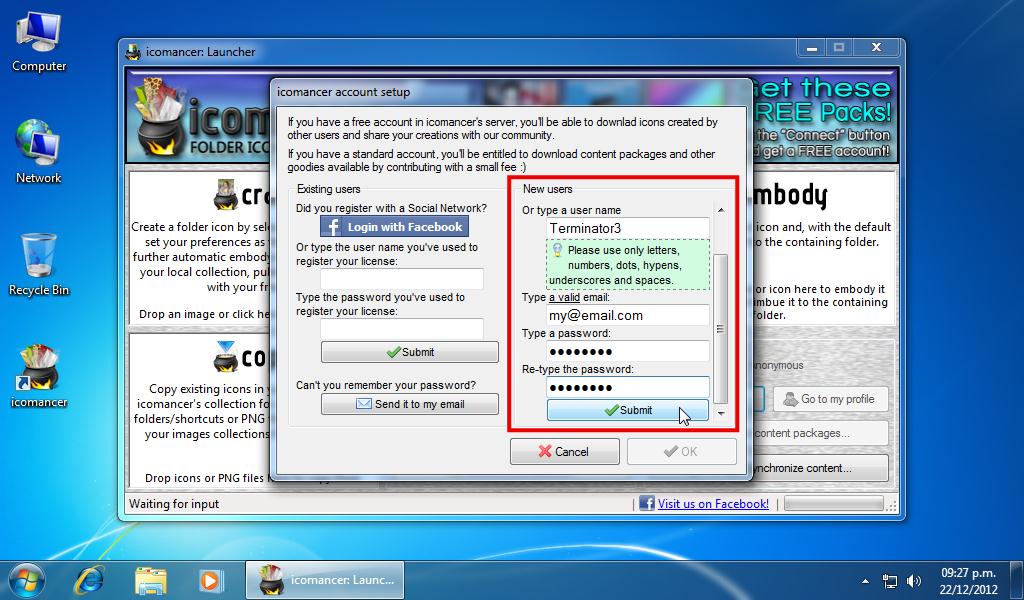
Once the connection window is open, you type some info to create your account.
You can also create your account by logging in from a Social Network! |
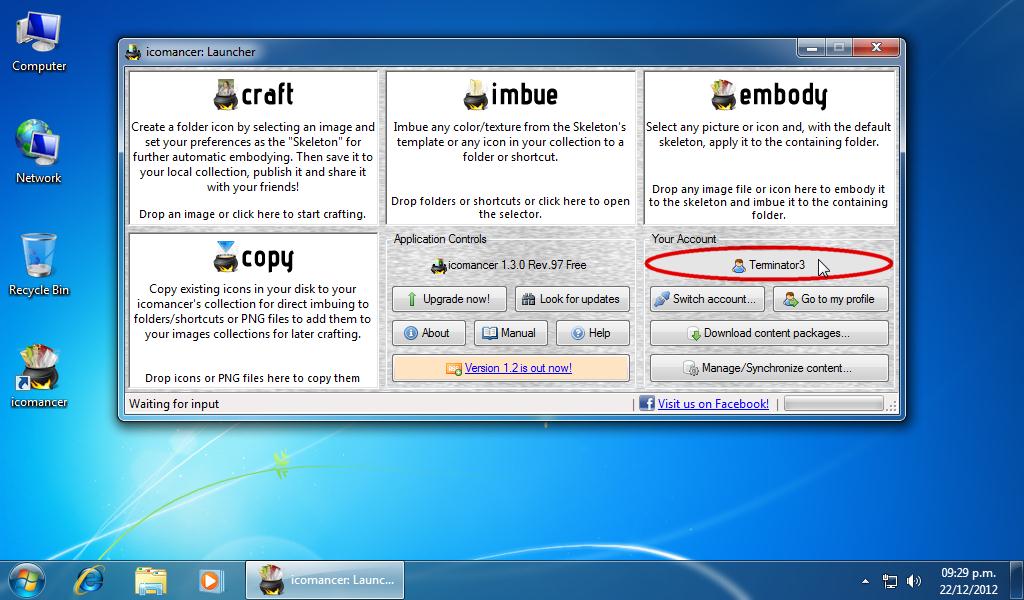
| The launcher with a connected account |
|
|
After logging in and restarting icomancer, you're ready
to get content packs from our server. |
Getting stuff
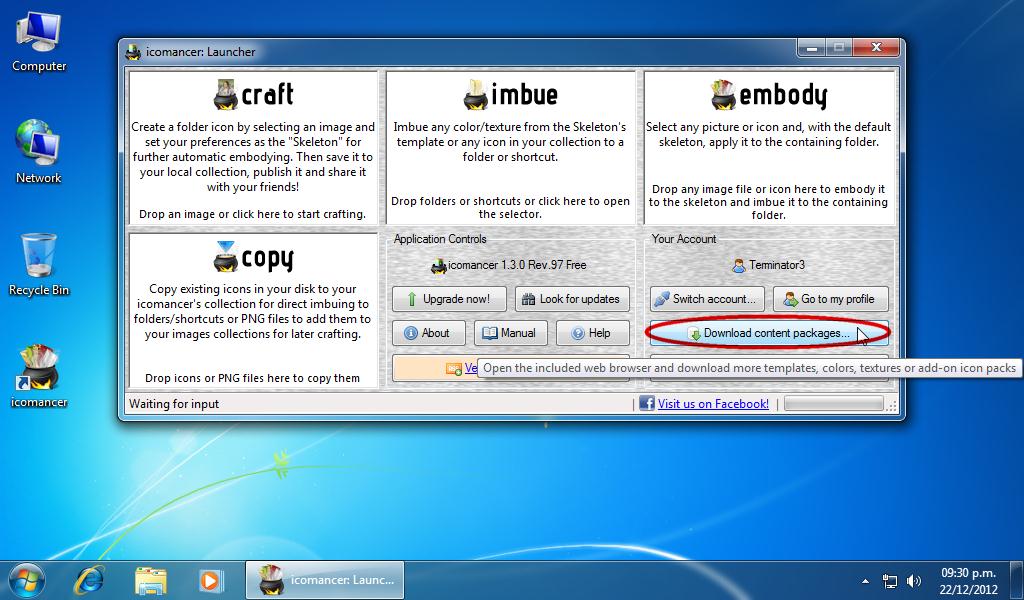
With your free account, you can download free content packs. If you have a standard or corporate account, you can get premium content packs. Getting them is as simple as 1-2:
| First: click on "Download Content Packages..." | Then browse, pick and get. |
|
|
|
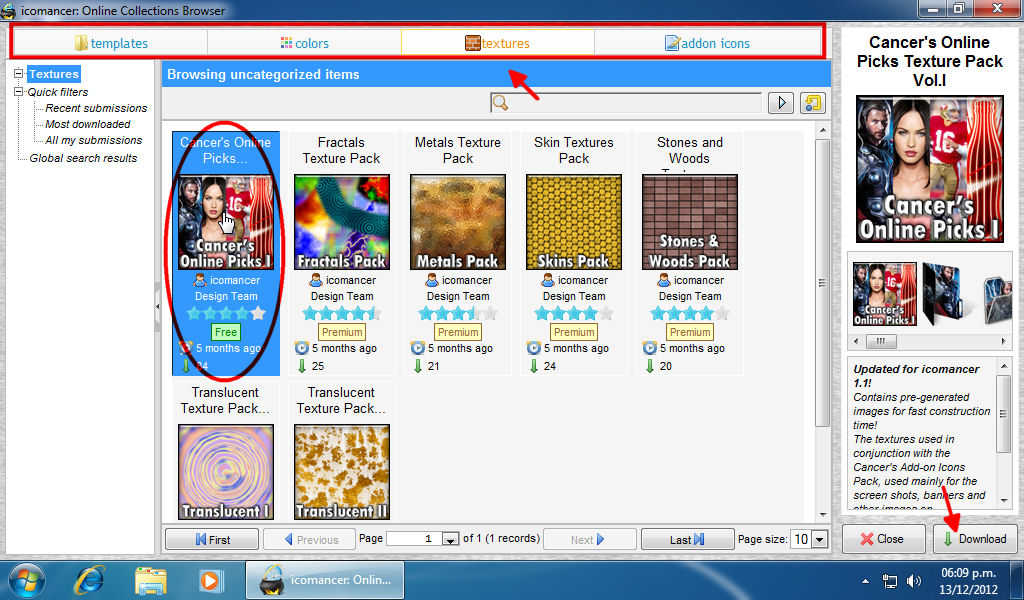
With your account connected, the "Download Content Packages" button is enabled.
|
When you click on it, the Online Collection Browser comes up, where you can get
folder templates, color palettes, texture packs and add-on icons packs.
|
Crafting images to icons
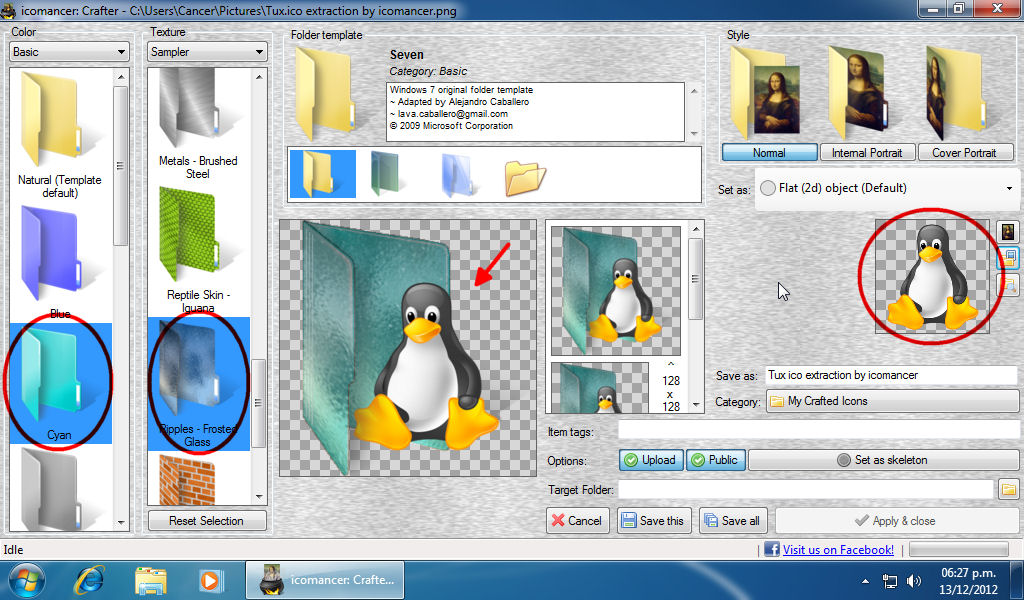
The Crafter is the main composition window. Here's where you pick your images and, by selecting colors, textures and styles, you make what you want.
| First: click or drop an image over the Crafter area | Then choose and apply. |
|
|
|
You can drag some image from some Windows Explorer window if you want.
|
The magic occurs here with your clicks on the image controls. As you can see,
the Colors and the Texture selectors have droplists on top, where you can
pick other palettes or categories.
|
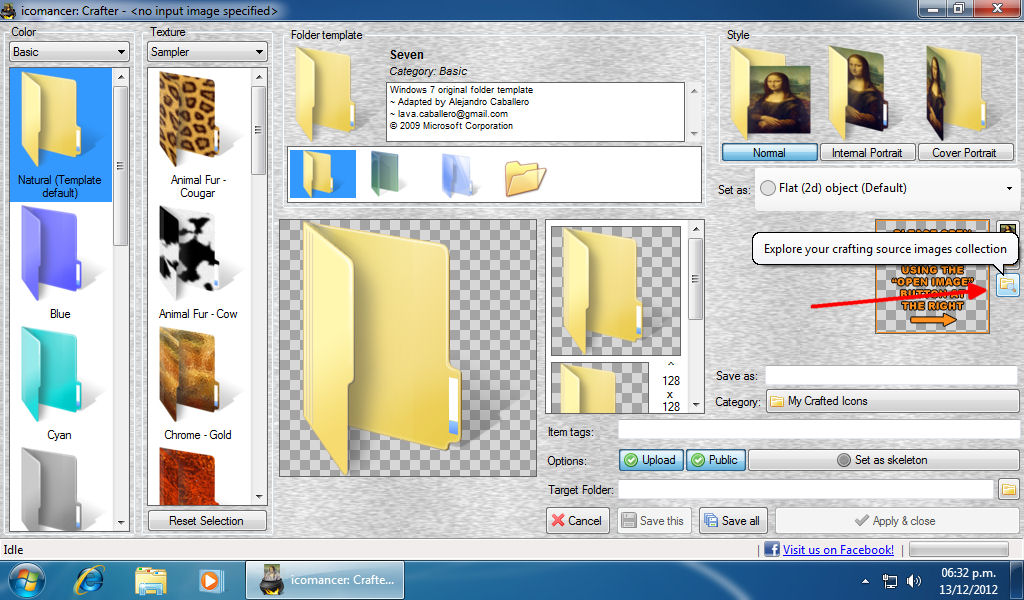
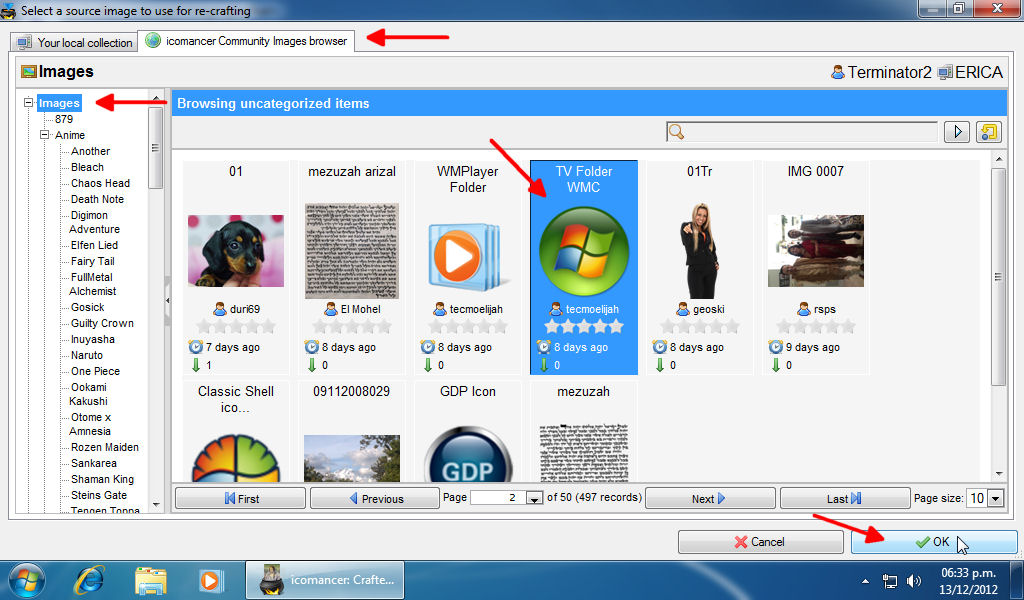
If you want to craft an image but you don' have it, you can try browsing the Online database
| Click on the "Explore" button... | ...and dig in the Community Images Browser |
|
|
|
The "Explore" button opens the "Source Images Explorer", where you can
browse your existing source images or the icomancer server's database.
|
While browsing the Community Images, don't forget to rate other users submissions!
|
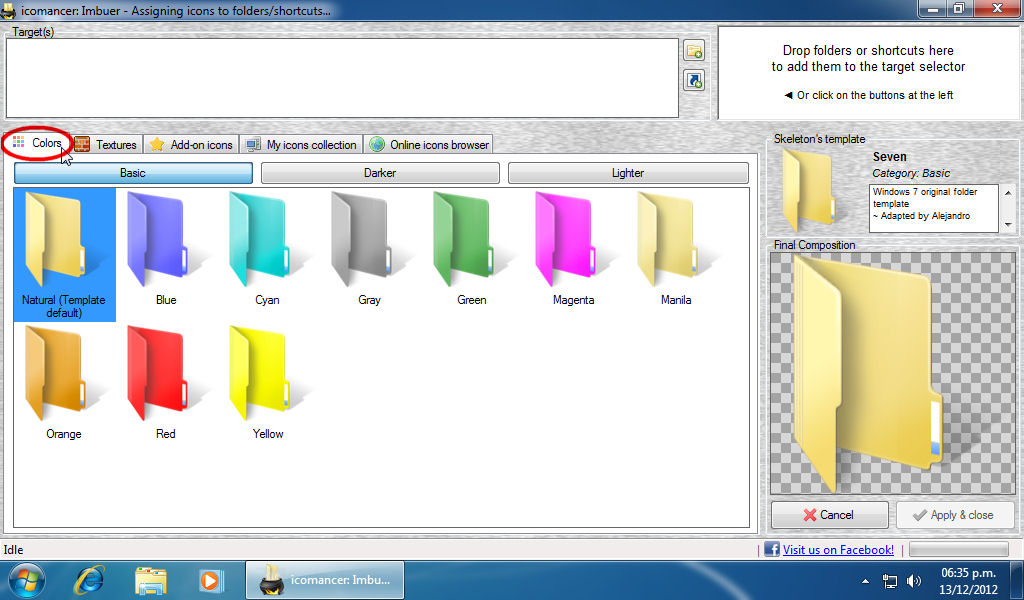
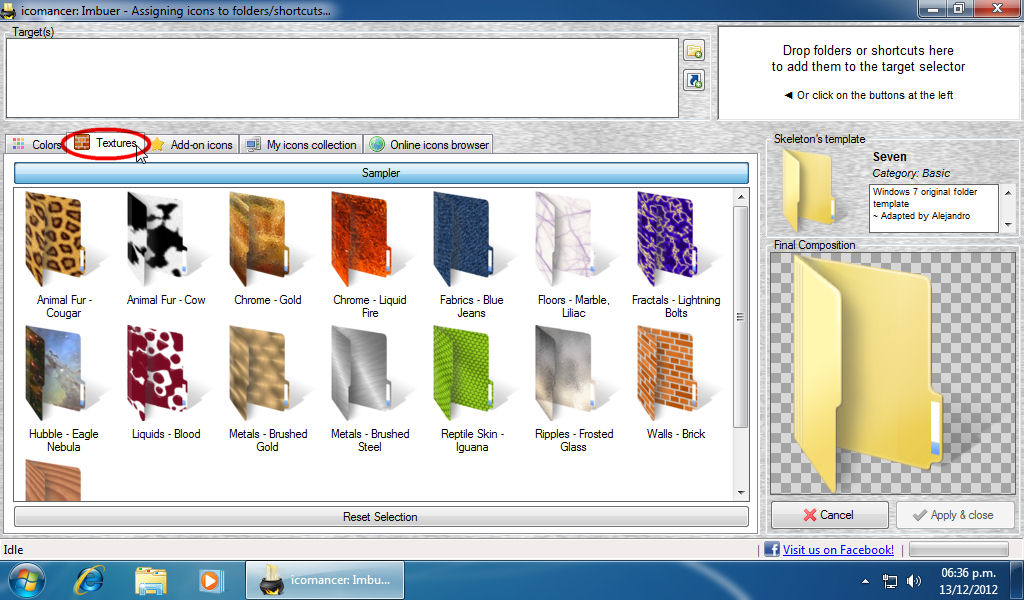
Imbuing icons to folders
The "imbue" mode is used when you want to set an icon to a folder. Wether or not you have crafted icons, you can use the selectors to make your folder look nicer.
| Click on the "Imbue" area of the Launcher |
|
|
You can also drop folders here. IF if you're using
Windows Vista or Seven, you can drop shortcuts too! |
| The colors browser | The textures browser |
|
|
|
The "Explore" button opens the "Source Images Explorer", where you can
browse your existing source images or the icomancer server's database.
|
While browsing the Community Images, don't forget to rate other users submissions!
|
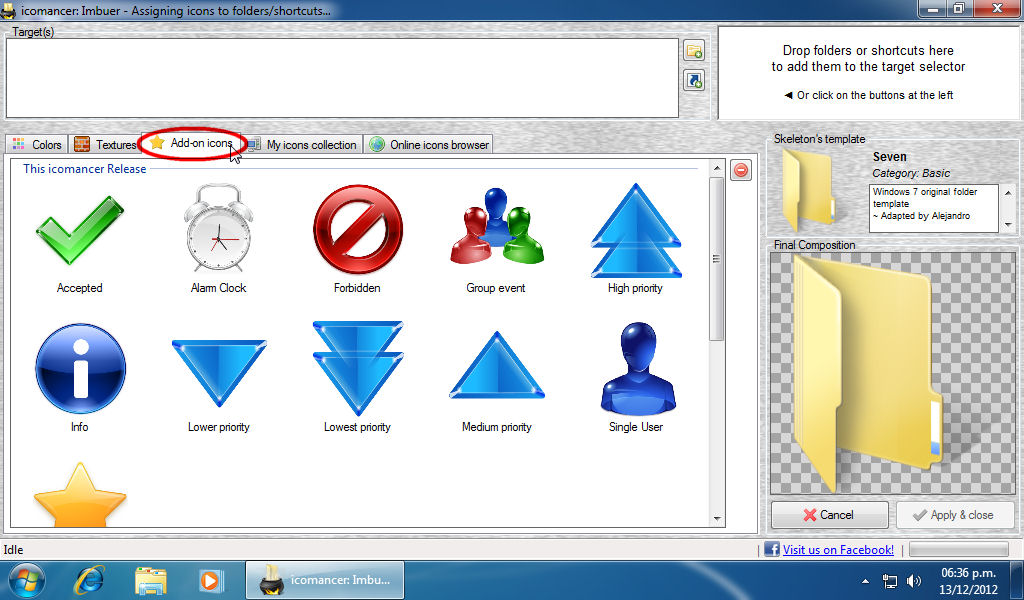
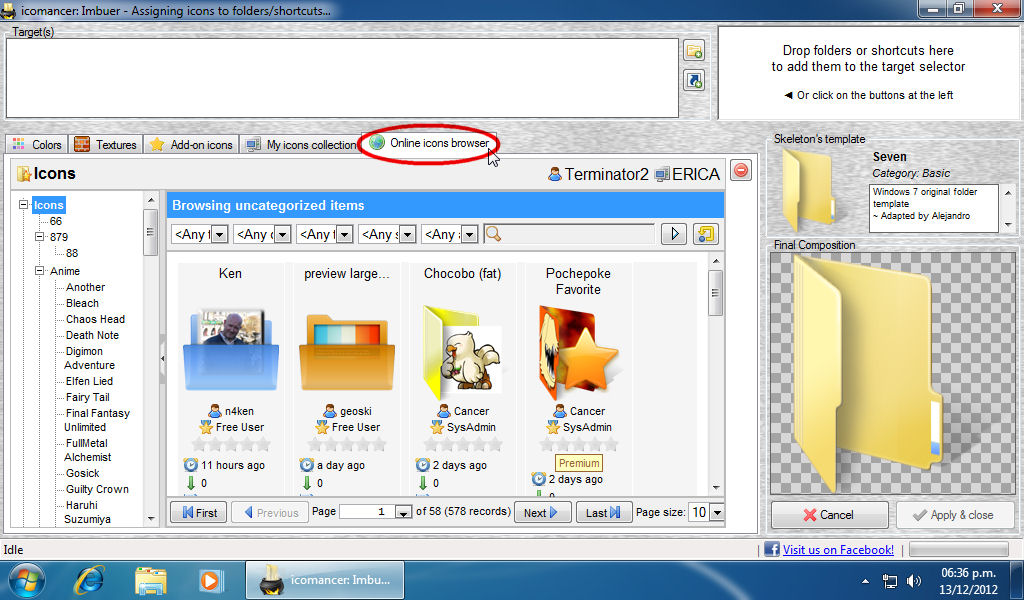
| The add-on icons browser | The online icons browser |
|
|
|
Here you can embed any add-on icon to the folder without needing to
select a portrait image, for the add-on icons here are handled differently.
|
Here you can download any previously created icon from other icomancer users!
Don't forget to rate what you see! it's important! |
Using the shell context menu
The other operating mode of icomancer is trough the Windows Explorer Context Menu. When you install icomancer, keys are added to the registry so when you right click on an image, a .ico file, a folder or a shortcut (on Vista and Seven), you can open icomancer in a corresponding action mode.
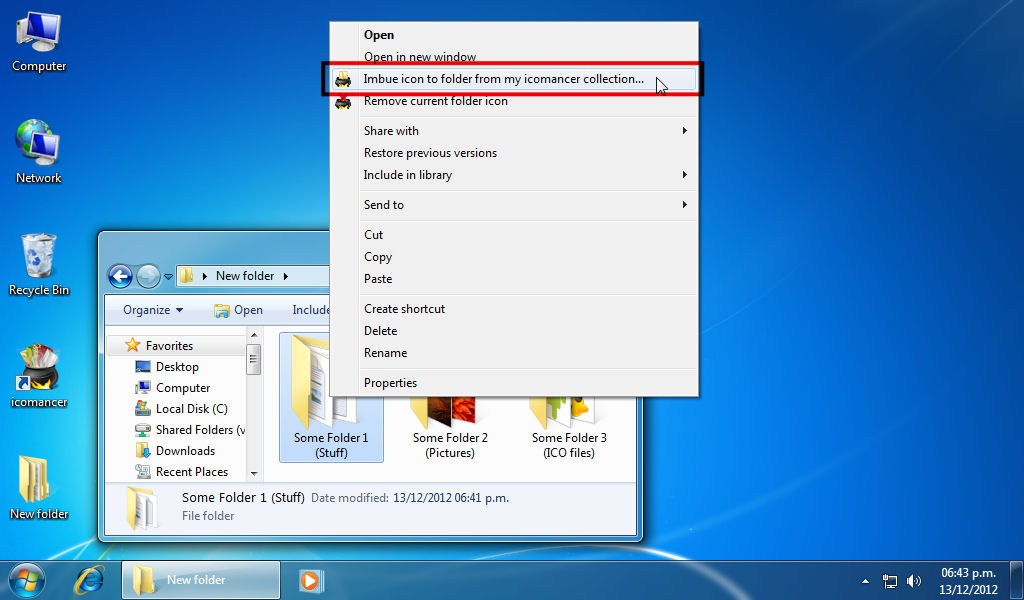
imbuing an icon to a folder
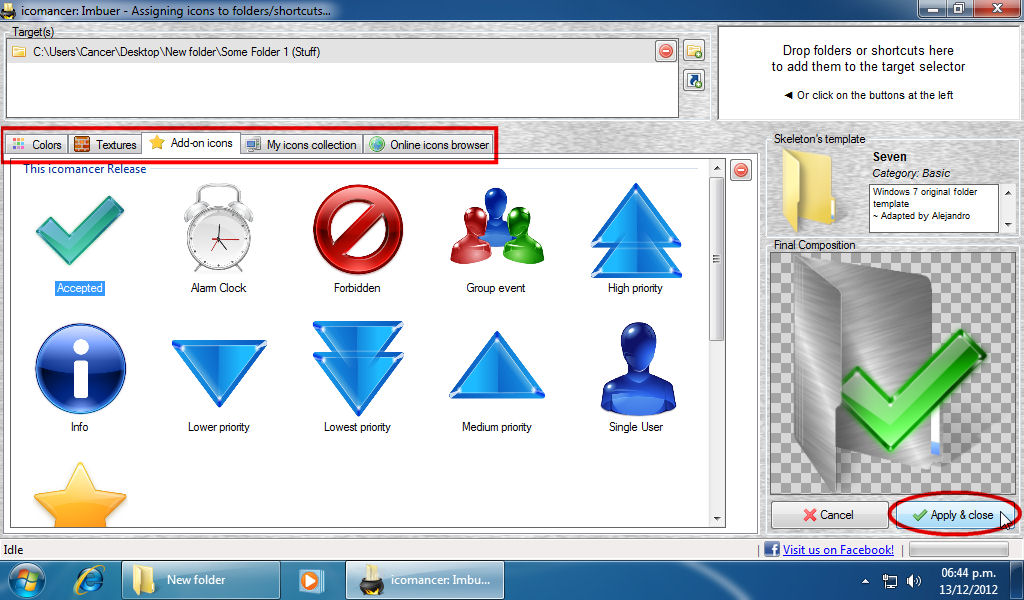
| Right-click some folder | Do your selections |
|
|
|
Note than the only action for folders (and shortcuts) is "Imbue icon to folder from my icomancer collection".
By selecting this command, the Imbuer will come up.
|
For this example, we've chosen the "Brushed Metal" texture and the "Misc icons: Accepted" add-on icon.
So, select color, texture, etc and hit "Apply & close".
|
| Presto! |
|
|
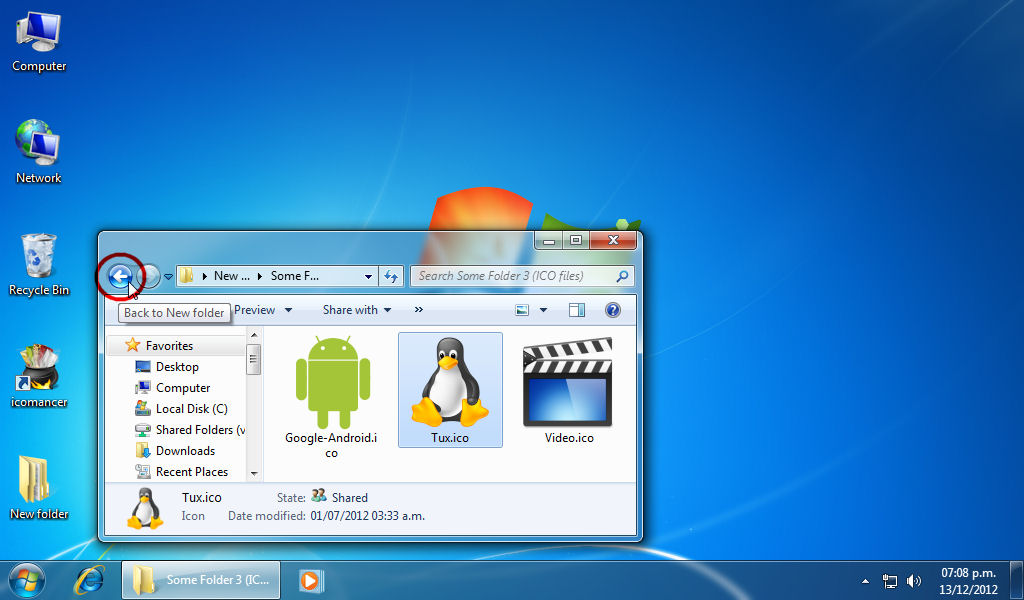
The icon is assigned immediately. Note: You may need to refresh the parent
folder window or go back-forth in order to see the icon applied. |
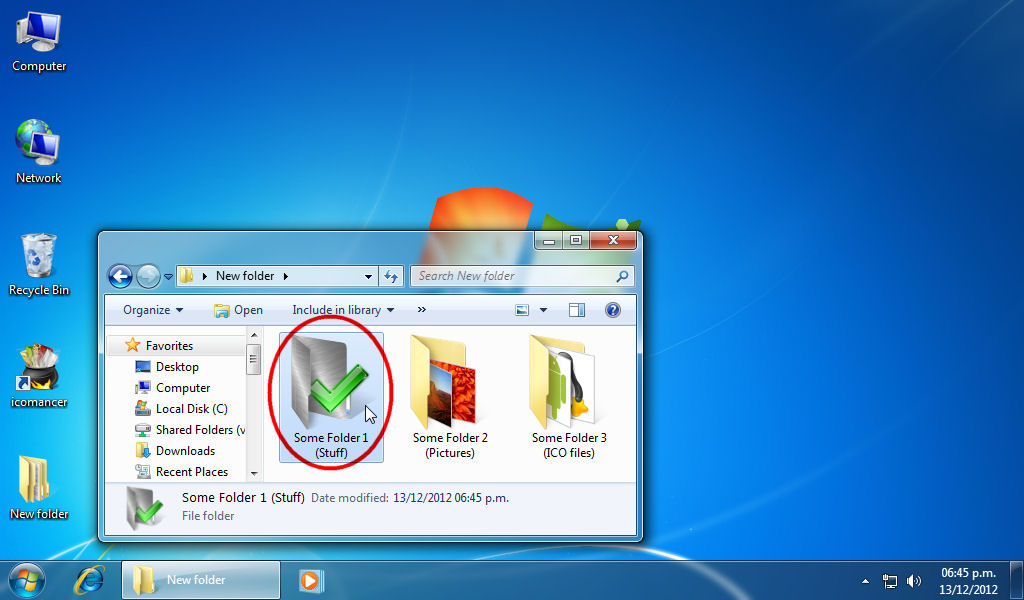
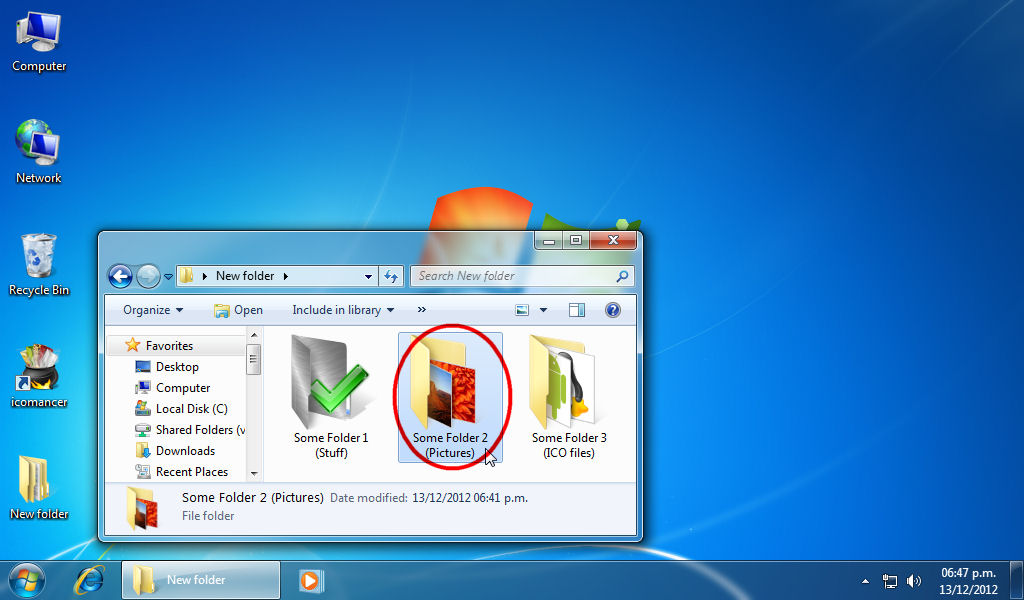
Crafting from the Windows Explorer
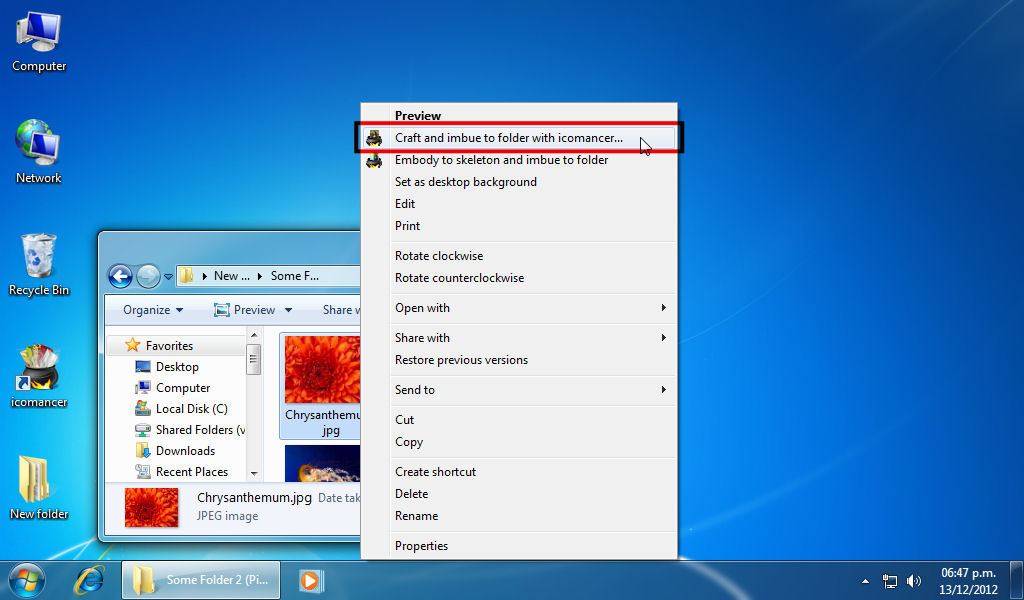
| Pick a folder with images inside | Right click on an image and pick the "Craft and imbue" command |
|
|
|
You can craft JPEG (*.jpg, *.jpeg), PNG (*.png) and GIF (*.gif) images.
Icons (.ico) files can also be crafted, while is not recommended.
|
When you right-click on an image, you can either craft it using the Crafter Window
or "embody" the image to your pre-set skeleton*,
which we also call "Autocraft".
|
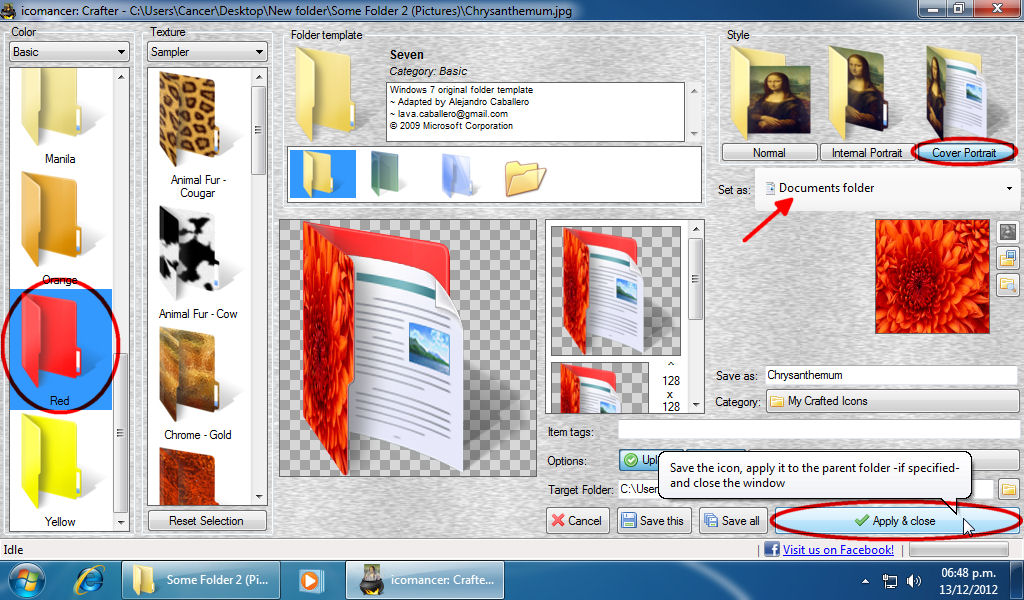
| Do your selections and apply | Go back to the parent folder |
|
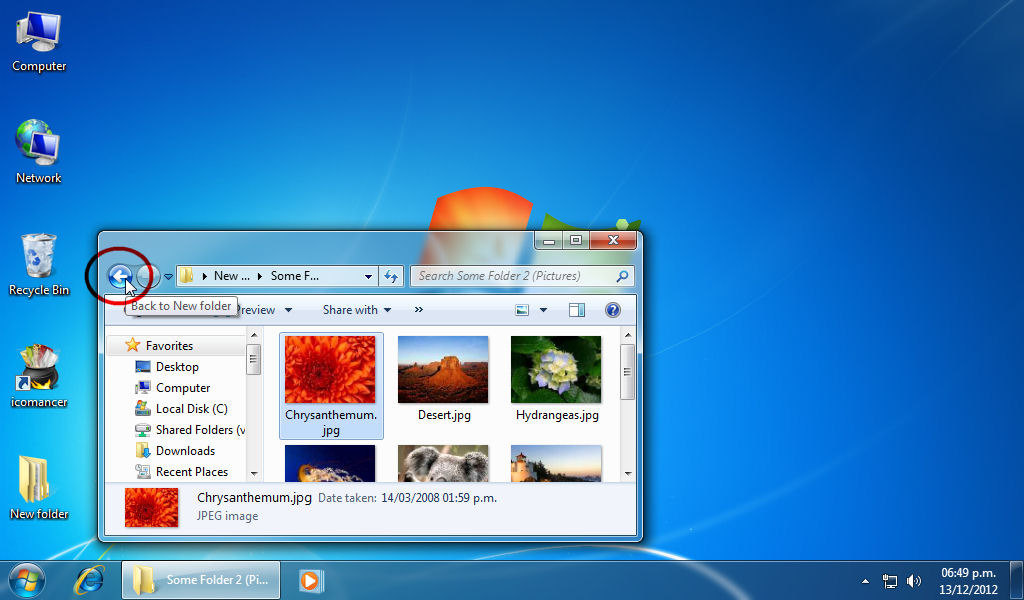
|
|
Here we picked the Red color and selected the "Cover portrait" style
for the image. Plus, we added the standard "Mixed content" add-on icon. Now
we're ready to hit "Apply & close".
|
When the Crafter closes, we should go to the parent folder.
|
| Presto! |
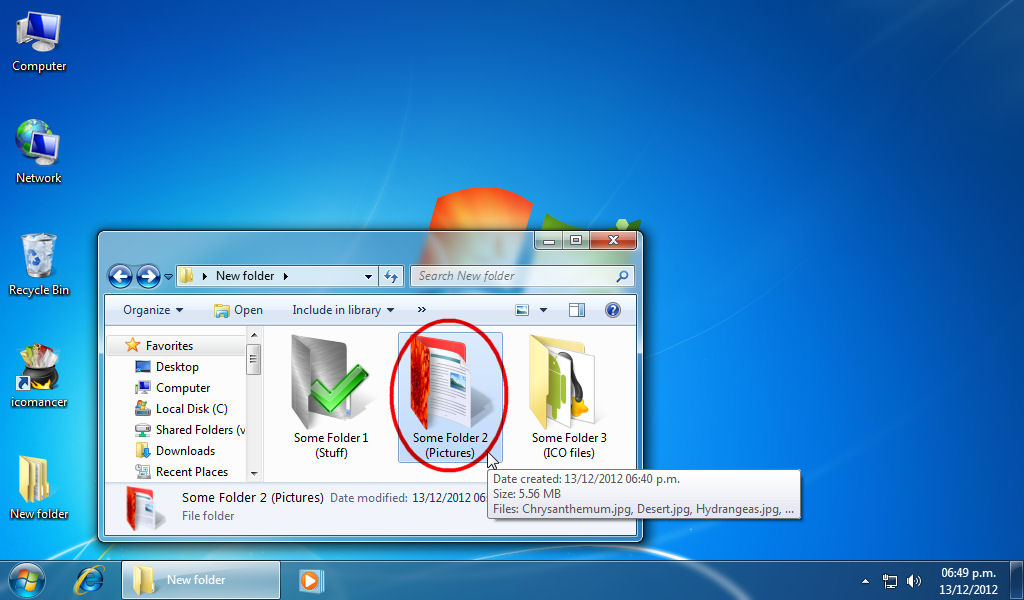
|
|
As you see, now the folder has a pretty much better icon assigned.
|
A plus for those who have tons of icons
There may be times when you have .ico files roaming around your folders, and you want to assign one of them to the parent folder without the need to go through the standard -painful- process of right-clicking the folder, going to the properties, then to the "Customize" tab, then to the "Change icon" button, then browsing, selecting and applying.
| Pick a folder with .ico files inside | Right click on the icon you want to set |
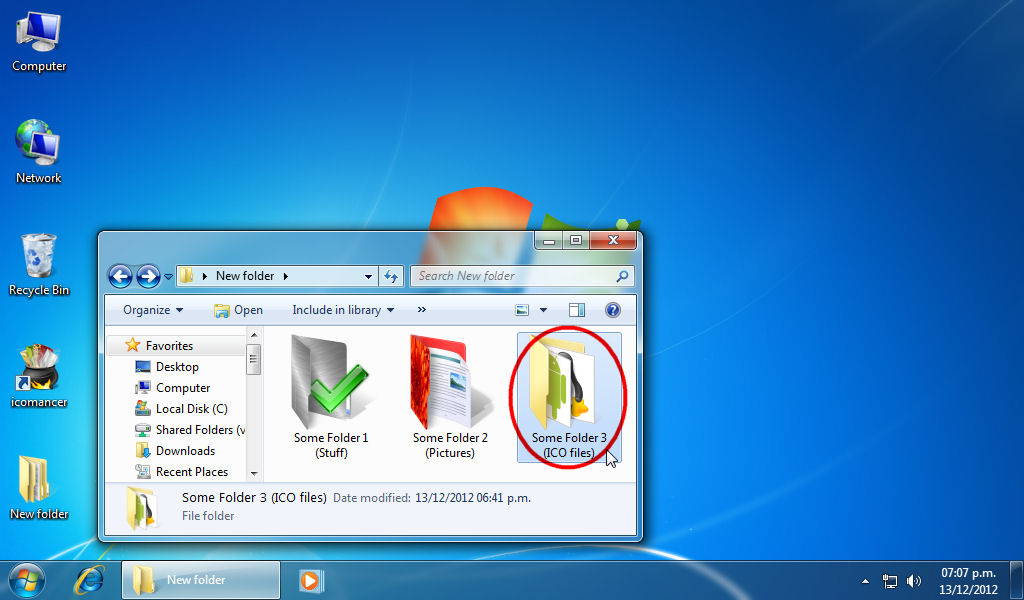
|
|
|
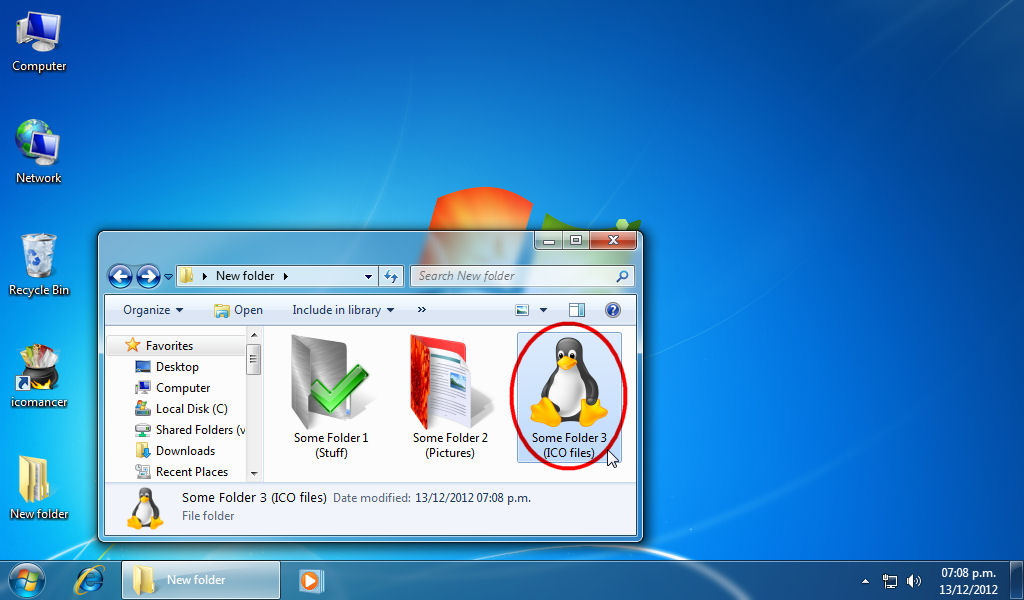
For this example, we already put some .ico files in a folder.
|
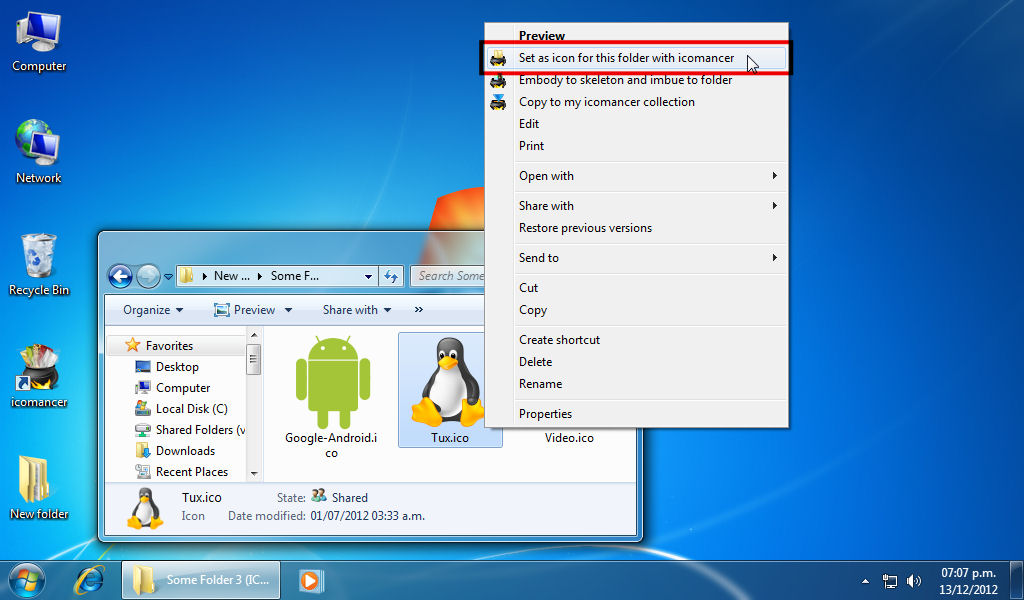
By right-clicking on the icon, you can set the icon as-is to the parent folder,
Embody it to the "skeleton" and embodying to the parent folder, or copy it to
your icomancer collection.
|
| Now let's go back... | Presto! |
|
|
|
You'll see no confirmation or window being opened. Everything happens in a flash.
|
There you go! Your folder now has a "raw" icon set.
|
NEW! Manage and synchronize your content
Now you can manage your local images and icons collections, and, if you have an account on our server, you can also manage your online collections and sync your local and remote items!
| The local icons browser | The remote icons browser |
|
|
|
|
You can rename, move to another category or delete local images and icons
|
In the remote browser, you can even make your items private or public
|
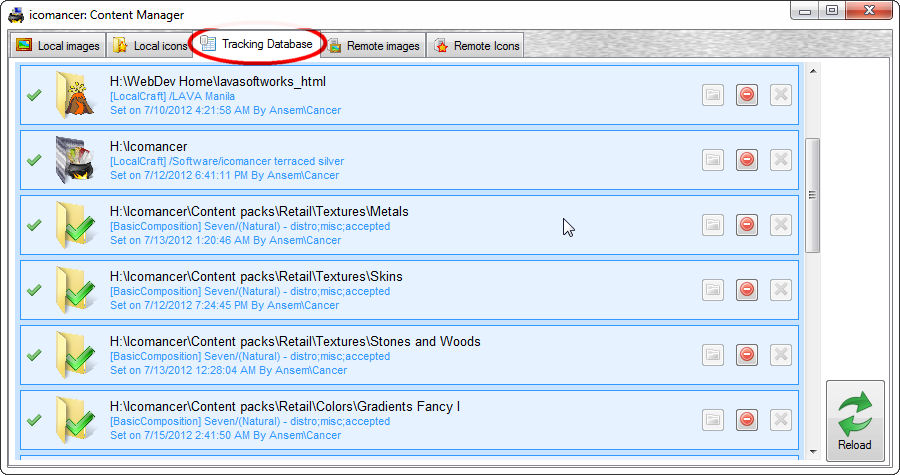
But that's not all: we've also included a browser/editor of the Tracking Database, to let you see what you've done with your folders!
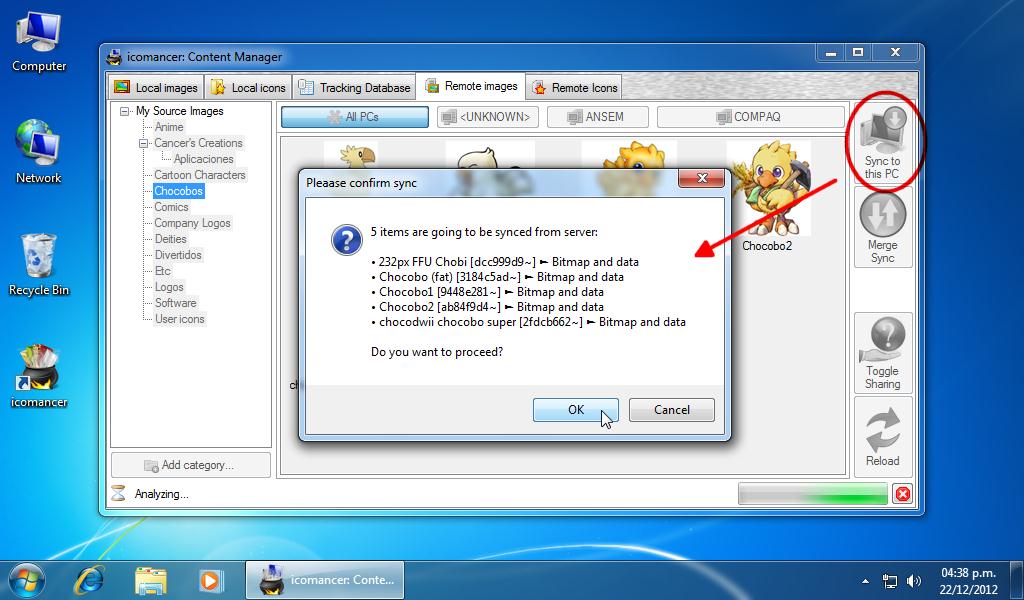
| The Tracking Database browser | Syncing content to/from the server |
|
|
|
Here you can update missing targets or even remove icons to folders!
|
Now you can sync your local collections back/forth with your account on icomancer's server
|
Now it's your turn to do it!
It was fun taking all these screen shots and putting them all in place for this document. We really hope you now have a broader view of all you can achieve with icomancer.
- Do you need more info? View the full features list
- All this was enough? Download icomancer now!
Alternate login
no longer available.
Please read this article